Here's some samples of sepia tone photos.
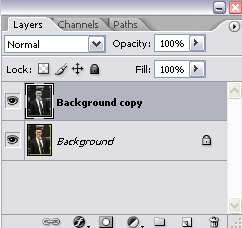
1. Naturally, you have to open your image in Photoshop. Duplicate it once. Desaturate the duplicate layer. Go to Image > Adjustment > Desaturate. Your layer palette should look like this:
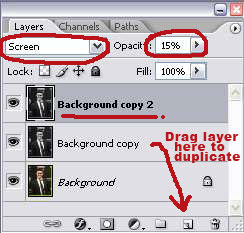
2. Now, if your image is a little bit dark, might want to do this..Duplicate the desaturate layer and set it to screen. Adjust the opacity until you get something nice.
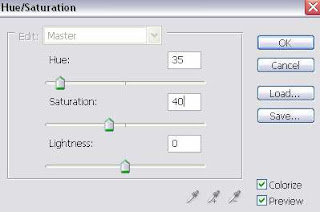
3. Next, go to Layer > New Adjustment Layer > Hue/Saturation. Check the colorize option and apply these settings:
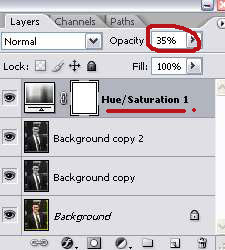
In the layer palette, reduce the opacity of this layer to 35%
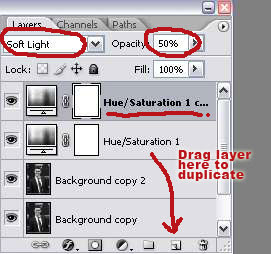
4. Duplicate the Hue/Saturation layer we created just now. Set it to Soft Light with 50% opacity.
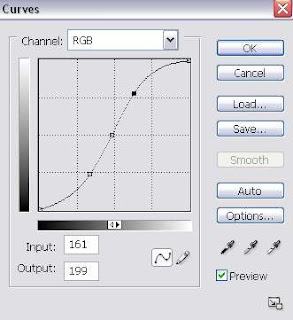
5. Then, go to Layer > New Adjustment Layer > Curves. Click three points along the line, then adjust the curve until you get an S-shape as shown below.
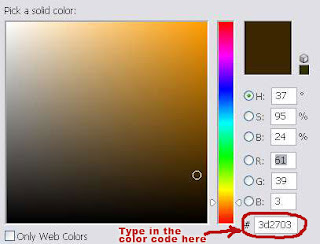
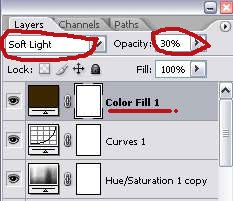
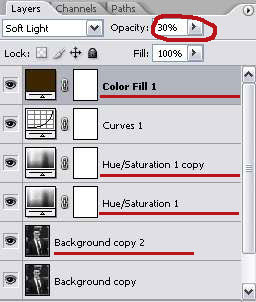
6. Now, go to Layer > New Fill Layer > Solid Color. Set the color to 3d2703 (dark brown). Set this layer to Soft Light with 30% opacity.
Some tips before I conclude this tutorial:
Looking at your final image, you can adjust the opacity of these 4 layers (underlined in red in the picture below) to get better result.
And here's the final image with a nice sepia tone coloring:


0 Comments:
Post a Comment