20 Sets Doodle Brushes for Photoshop

So, you tried to doodle or scribble on a peice of paper but nothing fun and cool came out. It's not the end of the world yet, coz our talented doodle artists are kind enough to share their sketchy scribble brushes with you. Enjoy 20+ sets of doodle Photoshop brushes for free, the cutest and coolest brushes you'll ever find on the web, well at least for now coz talented people just keep coming.


1. Download abstract ocean, cloud and sun doodle brushes
2. Download various heart shape sketch brushes


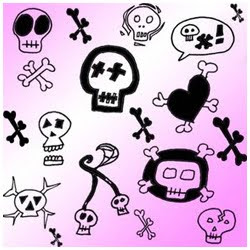
3. Download Skull Doodles Brushes
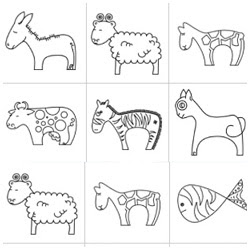
4. Download Animal Sketch Brushes


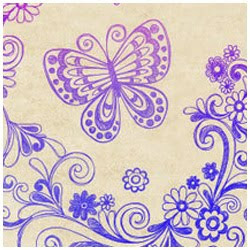
5. Download Butterfly and Flower Doodles Brush Set for Photoshop
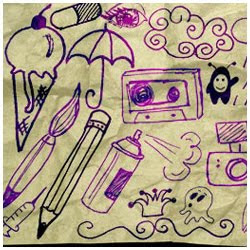
6. Download Random Doodles for Photoshop


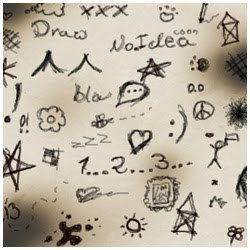
7. Download Cute Random Doodles Brush Set
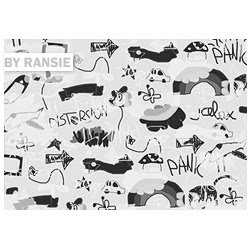
8. Download Random Travel-themed Scribble Brushes


9. Download Fun and Cute Scribble Brush
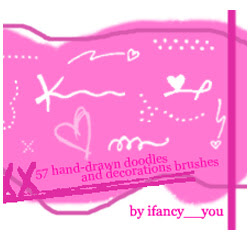
10. Download Hand-drawn Doodles and Decoration Brushes


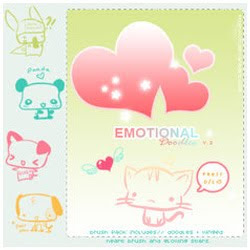
11. Download Cute Emoticon Doodles Brush Set
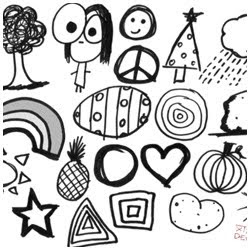
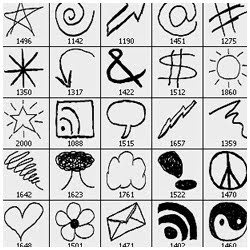
12. Download Sketched Icon and Doodles Brush for Photoshop


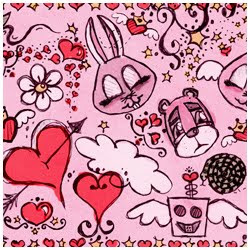
13. Download Heart and Cartoon Doodles
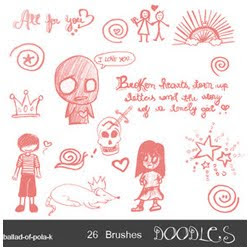
14. Download 26 Doodle Brushes


15. Download Random Sketch Brushes for Photoshop
16. Download Grunge Sketch Brushes


17. Download Heart Shape, Radio and Ipod Doodles Brush
18. Download Scribble Brush Set for Photoshop


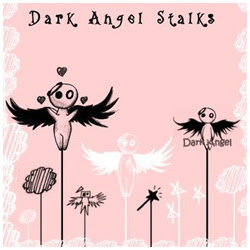
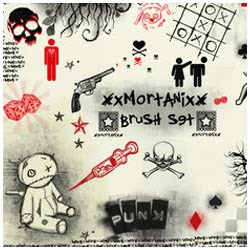
19. Download Dark Angel Sketch Brushes
20. Download Heart and Love Shape Drawing Brushes


21. Download Cute Doodle Brush Set
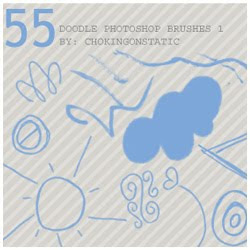
22. Download 55 Doodle Photoshop Brushes


Thanks and credit to the artists of these awesome doodles.
If you thing this collection of Doodle Brushes is somewhat cool,
you might also like our Tiny Decorative Text Brushes.

Frame Border Brushes Collection

What's a picture without a good frame..that's right, it's just a picture. And if you have Photoshop, using the picture frame brushes, you can decorate your photo or design..making it more interesting and unique compared to your other regular pictures. Following this geeky introduction are some of the best frame border brushes you could ever found on the web. Download links will take you to the artist page...credit to these talented people among us =)


Download Tech Vector Border Brush Set


Download Very Cute Corner Brushes


Download Simple Medieval Border Brush Set


Download Cool Spider web Border Brushes


Download Flower Picture Frames Brushes


Download Grunge Floral Swirl Brushes


Download Floral decorated frame brushes


Download Grunge Halftone Frame Brush


Download Tech and Floral Border Brushes


Download Antique Picture Frame Brushes


Download Curly and Flowery Border Brush Set


Download Grunge Film Strip Frame Brush Set


Download Rough and Grunge Border Brushes


Download Grunge Border Brush Pack

Photo Editing with Adjustment Layers

Today's tale is about the adjustment layer in Photoshop CS and why you should be using it instead of the regular image adjustment from the menu. If you've read some of my tutorials, you'll notice that I often use Adjustment Layers. And you're wondering..what's the different than the regular adjustment method..well, today..you're gonna find out!


First, let's see what the regular image adjustment does. You can find the image adjustment under Image > Adjustments. You'll see several options as shown below.


So, we have the photo below. As you can see, it's a little bit red on the skin. I'm gonna use Color Balance to correct the image and achieve the 'After' image.


Go to Image > Adjustments > Color Balance. The Color Balance window will appear. And I adjust the settings as shown below..and click OK.


After looking at the final image for a few seconds, I don't think it's the outcome I want. So, again..I go to Image > Adjustments > Color Balance. And a Color Balance window will appear. But the values are all set to zero.


What this essentially saying is that, part of the original image information is lost when I made the initial edit with the Color Balance adjustment. When I want to make another Color Balance adjustment, I have to start with the adjusted image, not the original one.

Once you've made the adjustment it will be permanent. Unless, you build a time machine, there's no way you can get the information of the original image back. Okay, maybe the 'step backward' function will help a little bit but it can only trace back until a certain amount of steps. When you close the file, there's no turning back.

And now, let's see why Adjustment Layers are so much cooler than the regular adjustment method. BTW, you can find the adjustment layer option under..Layer > New Adjustment Layer.


With the original image selected on the Layer Palette, go to Layer > New Adjustment Layer > Color Balance. You'll see a small window below..just click OK.


And you'll see the Color Balance window. Adjust the settings until you got something you like for the image. I chose the settings below.


In the Layer Palette, you can see a new layer called Color Balance 1 is created.


To see your original image, just click on the eye icon on the layer palette to make the Adjustment layer invisible. Click on it again to make it visible. Or if you don't like it, you can just delete the adjustment layer and you're left with the original image.


If after a few seconds, you change your mind and decided to change the color of your image a little bit. Just double-click on the icon circled in red to bring out the Color Balance window again.


Notice that, you still have the values of your setting just now. And from that, you can start adjusting the Color. It's like you're adjusting from the original image. And since you're making changes to the settings for the adjustment layer, not to the image itself, you're still not harming a single pixel in the original photo. In fact, you can go back and make as many changes as you want to an adjustment layer and never have to worry about damaging your original image..

As long as you're using adjustment layer for your editing, you can keep changing your mind over and over again even after you close the PSD file. You can reopen the PSD file a year from now and still make changes to your image. And remember, this method does not just apply to Color Balance adjustment, you can use it when adjusting the Curves, Levels, Hue and Saturation etc..

Therefore, if you decided to edit your image anytime soon, use adjustment layers..and you'll realized how much flexibility you can get when doing the adjustment.

Guidelines to Use Our Photo Effect Action

Some of the resource we offer here is 'Action'. Action or .atn file is a series of steps recorded in Photoshop to generate a certain photo effect (or in general, anything you do in Photoshop). This recorded steps can be saved and play-back at later time to achieve the same effect on different image. This action can also be shared with other Photoshop users to create the same photo effect. All you have to do is download the action to your hard drive. Load the action in Photoshop. Open your image and run the action. If you haven't start using action, better start now because it can save you a lot of time. If you download one of our Photo Effect Actions, here's a few guidelines for you.


Preparing your Image to Run the Action

Open your image in Photoshop and make sure your layer palette looks like the picture below ie. (a)only one layer, (b)it should be named 'Background' and (c)it should be locked with a sophisticated lock symbol on the side. Click on the 'Background' layer on the layer palette to select that layer and run the action.


If for some reason, above is not the case for you, here's what you can do to achieve the correct starting point for the action:


Running The Action

1. Download the Action to your hard disk.

2. Fire up Photoshop. If you cannot see any 'Action Palette', on the menu above, go to Window > Actions. You'll notice the pallete below appears:


3. Click on the small arrow on top right hand corner and select Load Action. Locate the Action file in your hard disk.


4. You'll see a new action folder in your action palette. In this example, it's the 'Canvas Painting FX' folder.


5. Click on the small triangle near that folder to see the Action available in that folder.


6. Open your image in Photoshop. And Run the Action.


About

Site Info

I share information,tutorial for those who want to learn. This blog is new and open to all, if you also want to become part of this blog and share your knowledge. I welcome you, just contact me using facebook or email. I hope everyone will learn something new from my blog. Sharing is Caring !!!

Tutorialz Geek - By Zaid Shakil Copyright © 2010