 to:
to: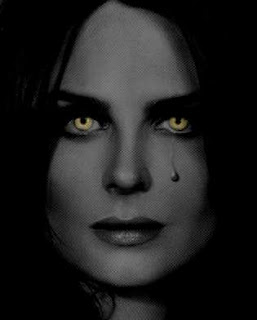
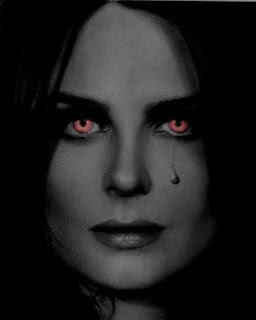
1. Open your image. Preferably something with eyes. Duplicate it twice. Set the first duplicate layer yo screen and the second one to soft light. Then hit CTRL+SHIFT+E to flatten the layers.
2. Duplicate the new image. Working with the duplicate layer, go to Image > Adjustment > Hue/Saturation. Set the master saturation to -100.
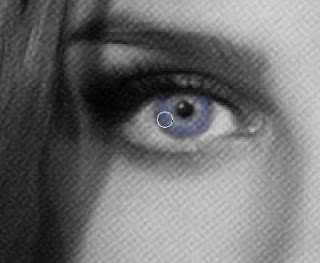
3. Now zoom in your image (CTRL ++) to 200%. Select the Eraser Tool. Choose a small soft round brush. The brush size depend on the size of the eyes. Mine is 9 pixels. Erase the iris area but don't touch the pupil or the white eye. Picture shown below:
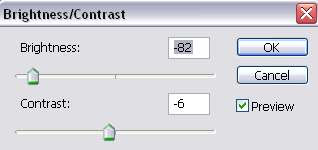
4. Now, still working with the black and white layer, go to Image > Adjustment > Brightness/Contrast. Reduce the brightness and contrast until you find the effect you want on the eyes. This is the setting I use for mine and the resulted effect.
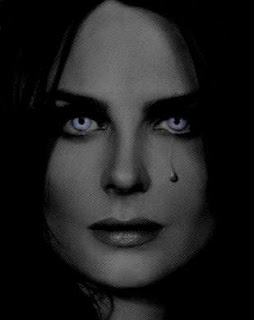
5. Now, blue doesn't seem so scary. How about a yellow eyes demon effect? Or even red maybe. Take your pick. To do this, we need to add an adjustment layer between the top and the bottom layer. Go to Layer > New Adjustment Layer > Color Balance.
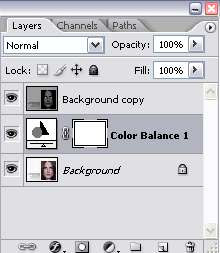
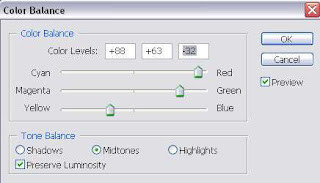
6. For yellow eyed demon effect in Photoshop, apply the setting below:

7. For red eyed demon effect in Photoshop, use the following setting:
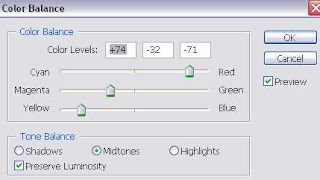

You can play around with the settings to get your very own glowing demon eyes ;)


0 Comments:
Post a Comment