If you're looking for an easy way to do this, first, you should try using the Extract Filter to remove the background. Then, if that doesn't work for you...proceed with the Pen Tool tutorial here.
Btw, we're cutting Chuck and Blair out of the background. Here's the final result:

A bigger version of this image can be found @ Blair and Chuck Wallpaper
Okay, I'm actually gonna guide you on how to cut Chuck, you'll have to figure out Blair on your own ;)
1. Open your image. Duplicate your image and make the original image invisible by clicking the eye icon beside it on the layer palette. Zoom in to 200%. (CTRL +++)

2. Select the Pen Tool (P). Make sure it is set to Path instead of Shape Layers.

3. Start tracing the edge of Chuck Bass with the Pen Tool. Aim your Pen Tool at the starting point and click your mouse, then click on the next path and so on. If you accidentally select the wrong path, don't freak out. Just go to Edit > Step Backward and continue from there.
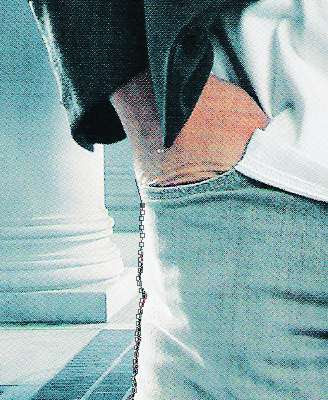
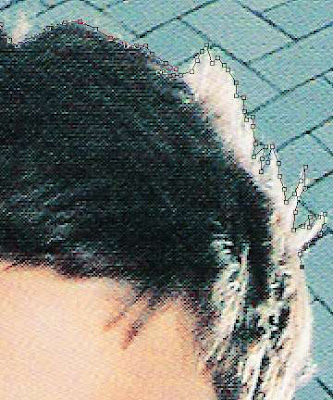
4. Now a little tip when you arrive at the hair. This is the area where most people will have problem tracing using the Pen Tool. You don't have to really follow the edge of the hair. I mean try if you can but when it's getting impossible, just use your imagination and create your own spikes and curls. As long as the spike is within the hair color and doesn't extent to the background, you'll be fine.
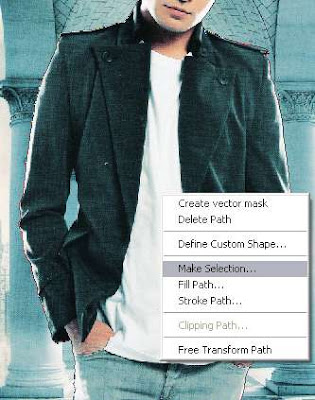
5. Okay, so you're done tracing, close the path ie. connect your last path with the first one. Now, right click on your image, and select Make Selection.
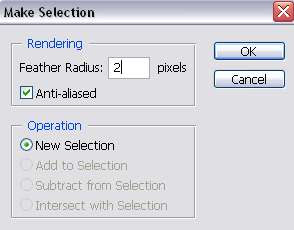
When a small window open, use the setting below and click OK:
6. Select the Rectangular Marquee Tool (M). Right Click on your image and choose Select Inverse. Then hit the Delete key.
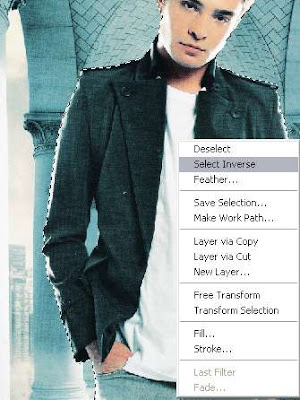
You'll have this:
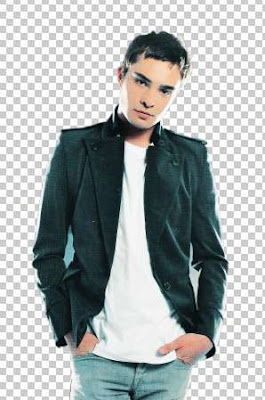
Well, there's still some background between the body and the arm. Use the Pen Tool to trace that area, make selection and then delete that part.
And here's the final outcome after I added a white background underneath it. You'll get a nice picture minus the background.


0 Comments:
Post a Comment