Create Professional B&W Photography

Share There are several ways to get the Black and White effect on your picture. I'll show you one way to do it using Channel Mixer and Gradient Map in Photoshop. Don't worry, it's not as complicated as it sounds. With only 3 easy steps, you'll get a high contrast black and white picture that looks rather professional. So, if you feel like going back to basic today, let's try this black and white photography. Some camera can do this automatically for you. But if you don't have that kind of camera, Photoshop is here to help.


1. Open your image. Duplicate the image.

2. With the duplicate layer selected in the layer palette, go to Layer > New Adjustment Layer > Channel Mixer.
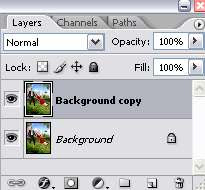


On the first pop-up window, click OK. Then, you'll see the channel mixer window.


Check the Monochrome box. Then, adjust the Red, Green, Blue and Constant settings. Each image will have different settings. So, just experiment with the values here until you find the perfect fit for your image. Sliding the slider to the right will bring out the whites. And sliding it to the left will increase the black on your image.

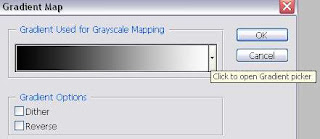
3. Next, go to Layer > New Adjustment Layer > Gradient Map. Click OK on the first pop-up window.
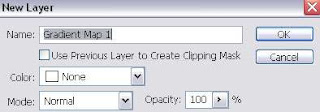


And this window will appear. Select the Black, White gradient and click OK.


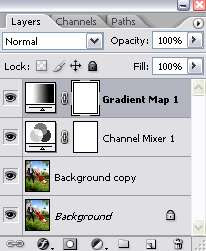
4. Here's your layer palette now. And you're done =)


0 Comments:

Post a Comment


About

Site Info

I share information,tutorial for those who want to learn. This blog is new and open to all, if you also want to become part of this blog and share your knowledge. I welcome you, just contact me using facebook or email. I hope everyone will learn something new from my blog. Sharing is Caring !!!

Tutorialz Geek - By Zaid Shakil Copyright © 2010