1. As usual, open your image in Photoshop. Then, go to Image > Mode > Grayscale. A small window will pop up, choose Merge. And you got yourself a grayscale image.
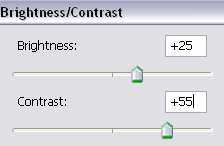
2. In the next step, we want simplify the image into two values – black and white. Go Layer > New Adjustment Layer > Brightness/Contrast. I use the setting below.The setting will change depending on your photo. For this image, these values result in the desired balance of whites and blacks.
3. Next, go to Image > Mode > RGB.
4. Here's our image now. Looks a little rough.

To remove these roughness, we'll add some blur to the image. Duplicate your image layer. Choose the duplicate layer in your layer palette. Then, go to Filter > Blur > Gaussian Blur. Set the radius to 2 or 3 depending on your image.
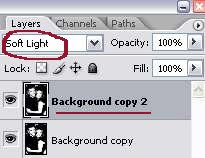
5. Then, set the blending mode of that duplicate layer to Soft Light or Overlay.
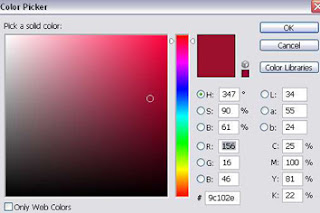
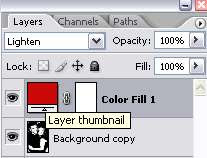
6. Now, we want to add color to our image. Go to Layer > New Fill Layer > Solid Color. On the Color Picker window, pick the color you want to use.
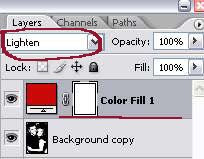
7. Set the Color Fill layer to Lighten.
8. Then, flatten all the layers by clicking CTRL+SHIFT+E.
9. Now all you have to do is, open a new blank canvas, File > New. Drag the image
on your previous canvas to the new canvas. Resize it if you want.

10. We already got one color settled which is the red one. Now, working with your previous canvas, go to Edit > Step Backward to unflatten your layers. Double click on the Layer Thumbnail to bring up the Color Picker window and choose your next color.
11. Loop through steps 7 - 10 until you got all 4 colors of your image. And here's my final outcome.


0 Comments:
Post a Comment