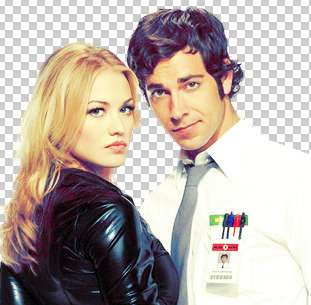
1. Open your image in Photoshop. Now, we're gonna delete the background and leave only the main subject to work with. In my case, it's Chuck and Sarah minus the background. If you already have a white background to start with, you can skip step 2 and jump straight to step 4.
2. You can remove background using the Pen Tool Method or the Extract Filter in CS2 and above version of Photoshop. Follow the link below to see the tutorial for both methods.
A. Remove Background with Pen Tool
B. Remove Background with Extract Filter
Alternatively, you can use the Magic Wand tool to make selection and delete the background. But most of the time, it won't give a satisfying result especially with too much distraction in the background.
The Pen Tool works for most background condition, but it takes longer time...facts of life I guess. Since my background is not that complicated, I'm gonna choose the Extract Filter method. And below is my result.
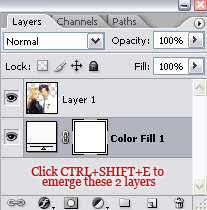
3. Now, we'll create the white border around the image. Go to Layer > New Fill Layer > Solid Color. When the Color Picker window appears, choose white color and click OK. Re-arrange your layer palette so that the white background is underneath your image. Drag and drop your layer on your layer palette to re-arrange. Next, merge the image with the background by clicking CTRL+SHIFT+E.
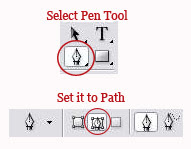
4. Select the Pen Tool (P). Make sure it is set to Path. Start tracing around your picture. Not so close to edge though, leave some white background for border. First time using Pen Tool, don't worry, you can learn the basic HERE.
Below is what I got after I'm done tracing and close the path (the end point connect with the starting point).
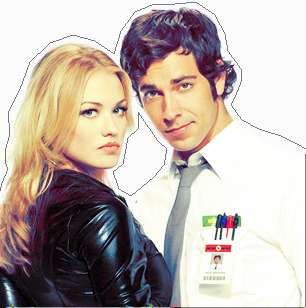
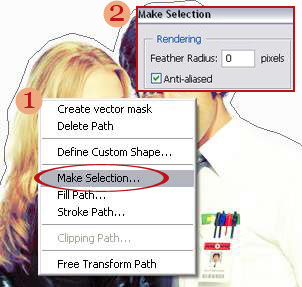
Right click on the path, and choose Make Selection. Set the Radius to 0 and tick the anti-aliased box. Click OK.
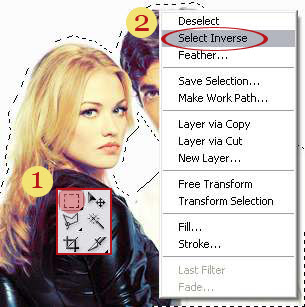
Select the Rectangular Marquee Tool (M) in your Tool box. Right click on your selection and choose 'Select Inverse'. Then, hit the Delete key on your keyboard. And you got the white border around your picture.
5. Well, with transparent background, you can't really see the white border. Let's spice the image with colored background. You can also use textures or colorful pattern as your background. To make it simple in this tutorial, I just create a new fill layer as my background. Go to Layer > New Fill Layer > Solid Color. I choose red on the Color Picker window and click OK. Re-arrange your layer palette so that the red background is underneath your image.


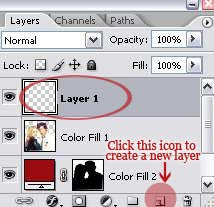
6. Now, we're gonna learn how to get that dashed line around the image. Add a new layer by clicking the 'Create a new layer' icon at the bottom of your layer palette.
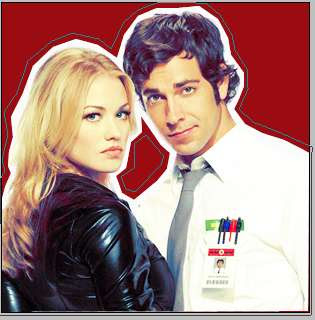
Select the Pen Tool (P). Set it to Path (like step 4). Create a path around your image. Remember, the dash line will follow exactly the path you make in this step. Below is my finished path.
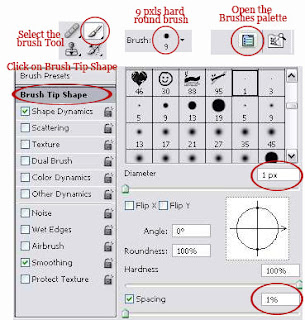
Next, select the Brush Tool (B). Choose a 9 pixels hard round brush. Click the small icon on the upper right hand side to open the Brush Palette. Click on 'Brush Tip Shape' to bring out the setting for it. Set the brush diameter to 1 px and spacing to 1%.
Set your foreground color to white (or whatever color you want the dashed line to be). Select the Pen Tool again. Right click on your path, and choose Stroke Path. Choose stroke with Brush. Untick the Simulate Pressure option and click OK.
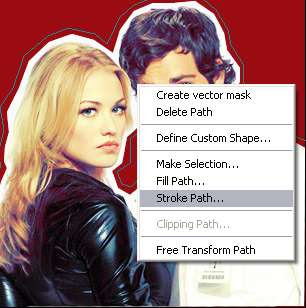

Click CTRL+H to hide the path, so we can see what we just did. Well, notice that it's not a dashed line yet. We're gonna achieve that in our next step. Click CTRL+H to unhide the path.
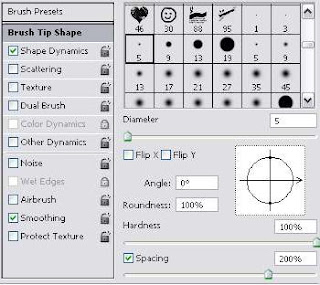
7. Select the Eraser Tool (E). Make sure the same 9 pixels hard round brush in step 6 is selected. Open the brush Palette. Follow the following setting for the Brush Tip Shape. Diameter: 5 pixels and spacing is set to 200%.
Select the Pen Tool (P). Right click on your path, and choose Stroke Path. This time, choose stroke with Eraser. Untick the Simulate Pressure option and click OK. CTRL+H to hide the path and you got the anticipated dashed lines around your image. Here's the final result.

If you have any problem, feel free to leave a question in the comment section below.


0 Comments:
Post a Comment